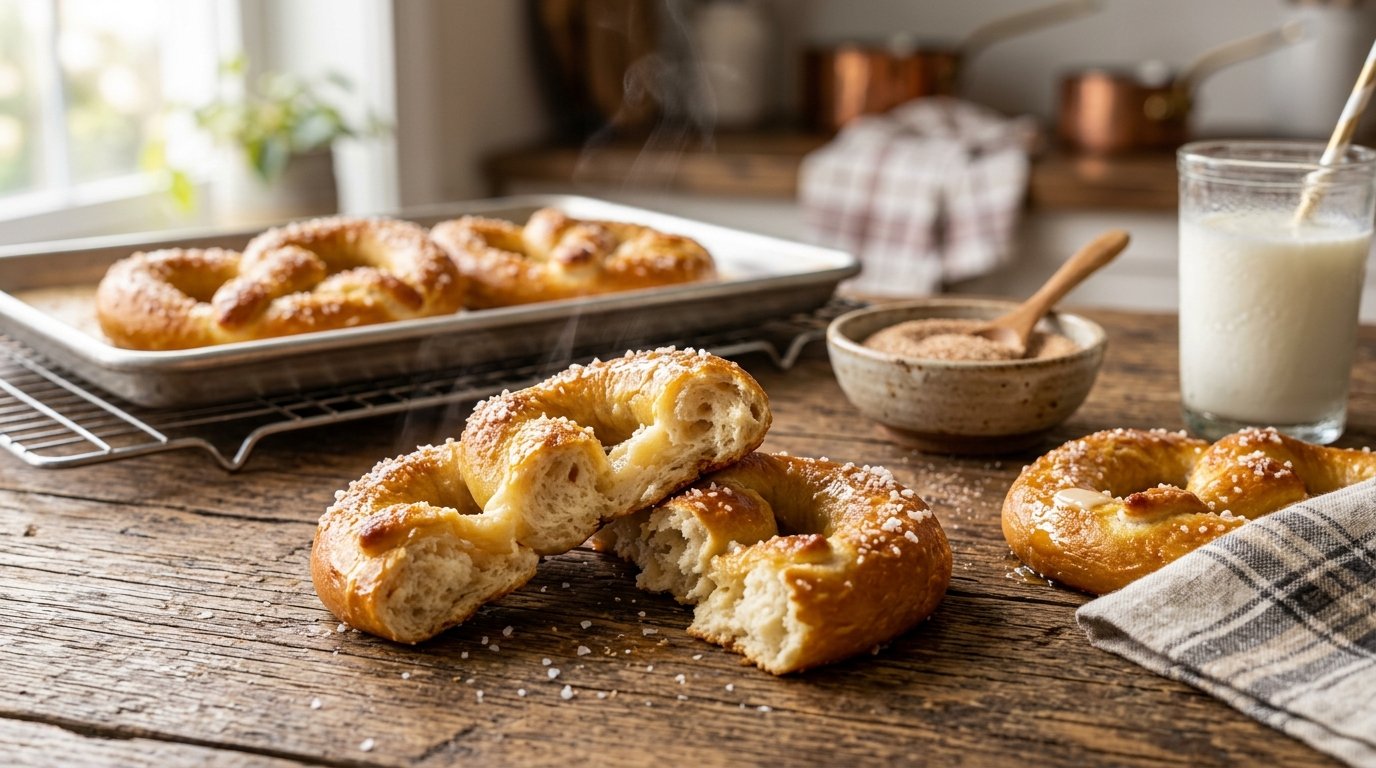
Soft pretzels from the mall always smell so good and taste even better. Many people love the warm, chewy ones with salt on top or sweet cinnamon sugar. This Anne Anne’s pretzels recipe lets you make them at home. You do not need special tools or hard skills. With simple steps, you can enjoy fresh pretzels that feel just like the real ones. Families enjoy making them together because the process is fun and the results make everyone smile.
Why Make Homemade Soft Pretzels?
Pretzels have a long history, but this style became popular through a kind woman named Anne who started selling them at a small market stand years ago. Her recipe grew into something many people know and love. Making them yourself saves money and lets you control the ingredients. You can eat them hot from the oven, and they taste fresher than any store version. Plus, the smell fills your kitchen in a happy way. Over time, people have shared ways to copy the soft texture and golden color at home. That is why this recipe works so well for beginners.
Another thing is that homemade versions let you try different toppings. Some like salty ones, while others prefer sweet. You can also make smaller bites for kids or parties. This means you can enjoy them any day, not just when you visit a mall.
What You Need for the Dough
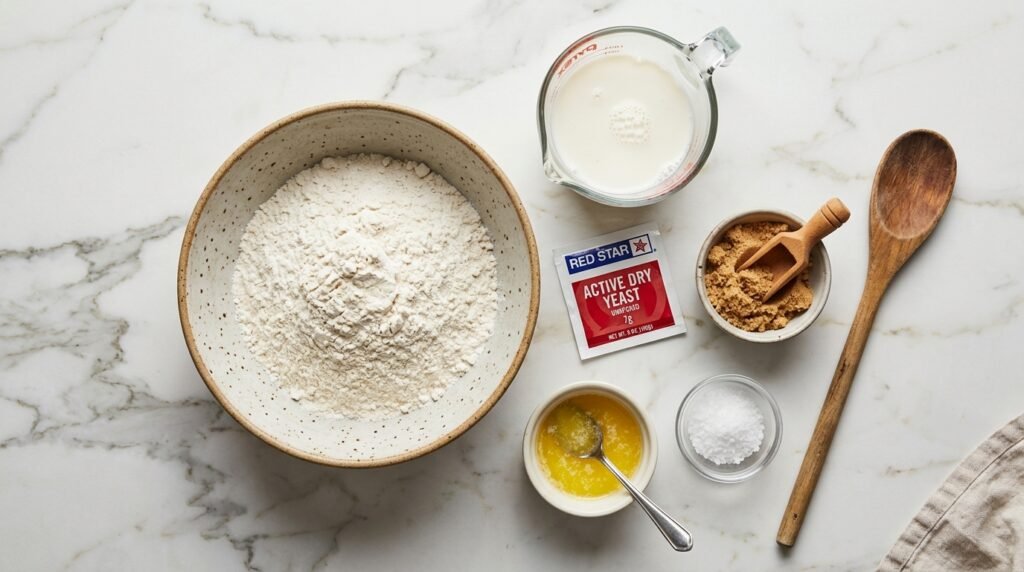
Start by gathering simple things from your kitchen. You will need warm water, a little milk, yeast, brown sugar, salt, flour, and butter. Warm liquids help the yeast grow strong. Brown sugar adds a gentle sweetness that makes the pretzels special. Butter keeps them soft inside.
Use about two cups of warm milk and water together, two teaspoons of dry yeast, one-third cup of brown sugar, one teaspoon of salt, and around five cups of flour. Melt two tablespoons of butter and add it too. These amounts make enough for eight to ten big pretzels. Many home cooks use bread flour for extra chew, but all-purpose flour works fine too. That is why the recipe stays easy for everyone.
Step-by-Step: Mixing the Dough
First, pour the warm milk and water into a big bowl. Add the yeast and a little brown sugar. Stir gently and wait about ten minutes. You will see bubbles form if the yeast is happy and ready. This step is important because active yeast makes the dough rise and become light.
After that, mix in the rest of the brown sugar, salt, melted butter, and most of the flour. Stir until it looks like a soft ball. Then put the dough on a clean table with a little flour. Knead it with your hands for five to eight minutes. Push it away, fold it back, and turn it. The dough should feel smooth and stretchy, like a soft pillow. If it sticks too much, add a tiny bit more flour. Kneading builds strength in the dough so the pretzels hold their shape later.
Next, put the dough in a greased bowl and cover it with a clean cloth. Let it rest in a warm spot for about one hour. It will grow bigger, almost double in size. This rising time gives the pretzels their airy texture. While you wait, you can clean up or get your baking sheets ready.
Shaping the Pretzels Like the Pros
After the dough rises, punch it down gently to remove extra air. Cut it into eight or ten equal pieces. Roll each piece into a long rope about 18 to 20 inches long. Take your time so the ropes stay even. If the dough bounces back, let it rest for a few minutes. This helps because rested dough is easier to shape.
Now form the classic twist. Make a U shape with the rope. Cross the ends over each other twice, then fold them down to the bottom of the U and press gently. It looks like a heart or a bow. Place each shaped pretzel on a baking sheet with parchment paper. Do this for all pieces. In addition, you can make small nugget shapes by cutting the ropes into short pieces. Kids love helping with this part because it feels like playing with clay.
The Secret Baking Soda Bath
This next step gives the pretzels their beautiful brown color and special outside skin. Mix two cups of warm water with two tablespoons of baking soda in a wide bowl. Stir until the soda dissolves.
Carefully dip each pretzel into the mixture for about 20 to 30 seconds. Use a slotted spoon so the pretzel does not break. Then put it back on the baking sheet. The baking soda bath changes the outside just enough to brown nicely in the oven without making it taste strange. That is why mall pretzels look so golden. Do not skip this because it makes a big difference in taste and look.
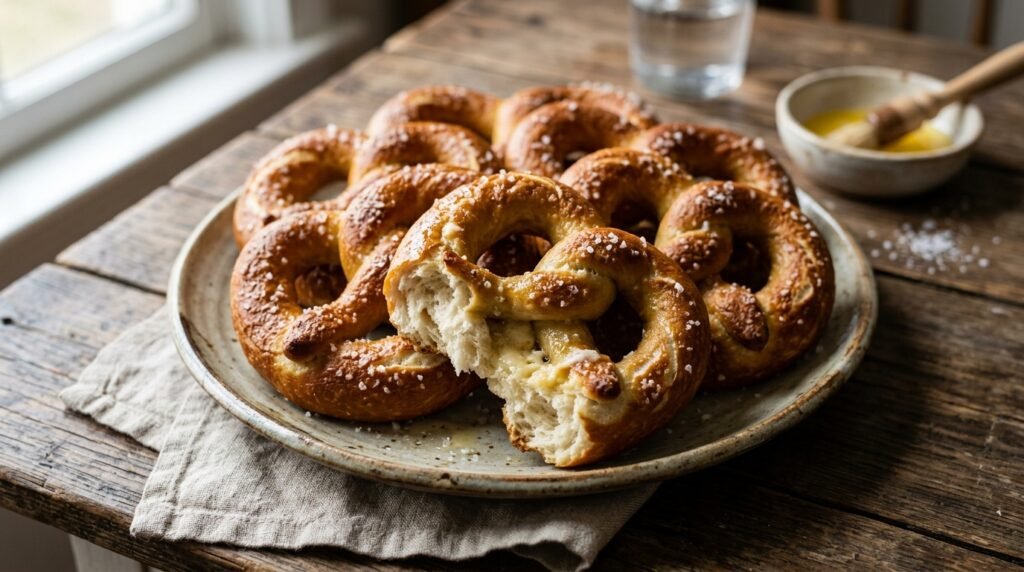
Sprinkle coarse salt on top right away while they are wet. The salt sticks well this way. For sweet ones, you can skip the salt and add cinnamon sugar after baking.
Baking and Finishing Touches
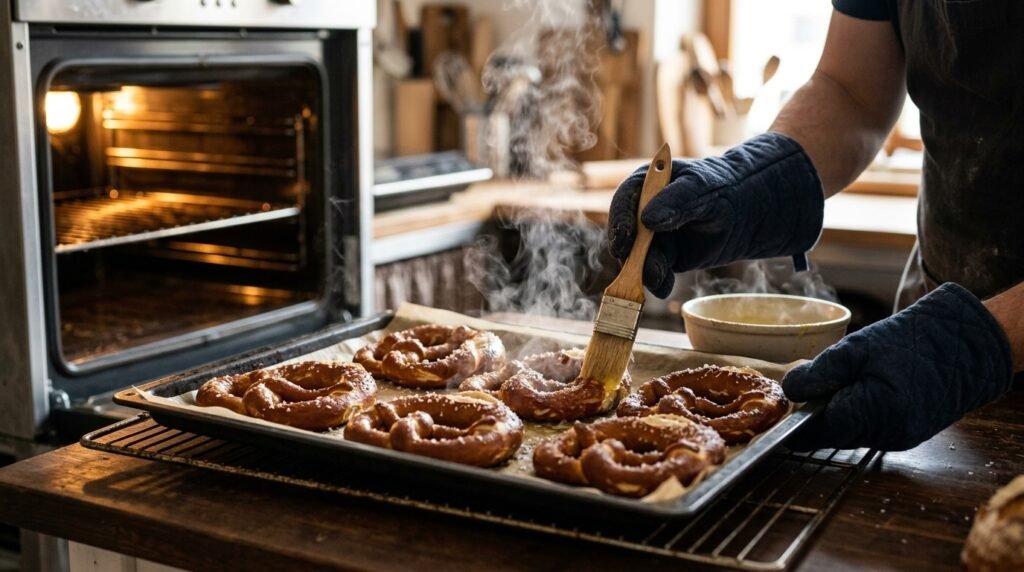
Preheat your oven to 425 degrees Fahrenheit. Bake the pretzels for 8 to 12 minutes until they turn deep golden brown. Watch them because ovens can be different. The bottoms should look cooked too.
After baking, brush them with melted butter while they are still hot. This step makes them shiny and adds rich flavor. For cinnamon sugar pretzels, mix sugar with cinnamon and sprinkle or roll them in the mixture after buttering. The butter helps the sweet topping stick.
Serve them warm. They taste best right away, but you can keep leftovers in a bag for a day. Warm them in the oven to bring back the softness.
Common Mistakes to Avoid
Many beginners add water that is too hot and kill the yeast. Always test the temperature on your wrist first. It should feel comfortably warm. Another mistake is not kneading long enough. Short kneading leads to pretzels that fall apart. Also, do not crowd the baking sheet because they need space to brown evenly.
Over time, you will learn small tricks like using a stand mixer if your hands get tired. Some people add a pinch of baking powder to the dough for extra fluff. Fresh yeast works better than old packets, so check the date. These small changes help you get better results each time you try the Anne Anne’s pretzels recipe.
Fun Variations to Try
Once you master the basic recipe, you can create new ideas. Make garlic butter pretzels by adding garlic powder to the melted butter brush. Or try cheese-filled ones by wrapping small cheese pieces inside before shaping. For parties, make tiny bites and serve with mustard or cheese sauce.
Another fun thing is to let kids decorate with colored sugar after baking. In addition, you can freeze shaped pretzels before the baking soda step and bake them fresh later. This means you can always have dough ready for surprise guests. Real-life example: one family makes a big batch on weekends and enjoys them during movie nights all week.
How to Store and Reheat
Keep baked pretzels in an airtight container at room temperature for one day. For longer, freeze them after baking and cooling. When you want one, thaw and warm in a 350-degree oven for a few minutes. The butter brush helps them stay soft even after freezing. Do not microwave because it can make them tough. Proper storage keeps the homemade taste fresh.
FAQ About Anne Anne’s Pretzels Recipe
Can I make this without milk?
Yes, you can use all water instead. The pretzels will still be soft, but milk adds a little extra richness.
What if I do not have brown sugar?
White sugar works, but brown sugar gives the classic flavor. You can mix a little molasses with white sugar if you have it.
Why do my pretzels not rise well?
Check your yeast and water temperature. Cold kitchens can slow rising, so place the bowl in a warm spot like near the oven.
Is the baking soda bath safe?
Yes, it is a common and safe step for soft pretzels. Just do not drink it.
Can I make them sweeter?
Absolutely. Add more sugar to the dough or use the cinnamon sugar topping for a dessert version.
How long does the whole process take?
About two hours from start to finish, including rising time. Most of that is waiting, so you can do other things.
What flour is best?
Bread flour gives more chew, but all-purpose is fine and easier to find.
Final Thoughts on Making Pretzels at Home
Learning this Anne Anne’s pretzels recipe opens up a world of fresh, warm snacks. You start with basic ingredients and end with something that feels like a treat from a favorite shop. Each step builds on the last, from mixing dough to that final butter brush. With practice, your pretzels will look and taste wonderful.
The best part is sharing them with family and friends. The smiles you see make all the effort worth it. Next time you crave something special, try this easy homemade version. You will feel proud of what you created, and your kitchen will smell amazing. Enjoy every chewy bite!
Disclaimer:
This article provides a general homemade copycat recipe based on common public methods for soft pretzels. It is for informational and educational purposes only. Results may vary based on ingredients, equipment, and technique. Always follow safe food handling practices. This is not affiliated with any brand, and we make no guarantees about exact replication of commercial products. Consult reliable sources for any dietary concerns.
Leave a Reply