Have you ever walked around a fair or carnival and smelled something sweet and crispy frying in hot oil? That big, flat, golden treat covered in cinnamon and sugar is often called a frying saucer. Many people also know it as an elephant ear. This simple dessert brings joy to both kids and adults because it is fun to make and even better to eat. In this article, you will learn everything you need to create your own frying saucer recipe at home. The steps are easy, the ingredients are common, and the results feel like a special treat from the fair. You can enjoy this crispy dessert with your family on weekends or for special celebrations.
Why People Love Making Frying Saucer at Home
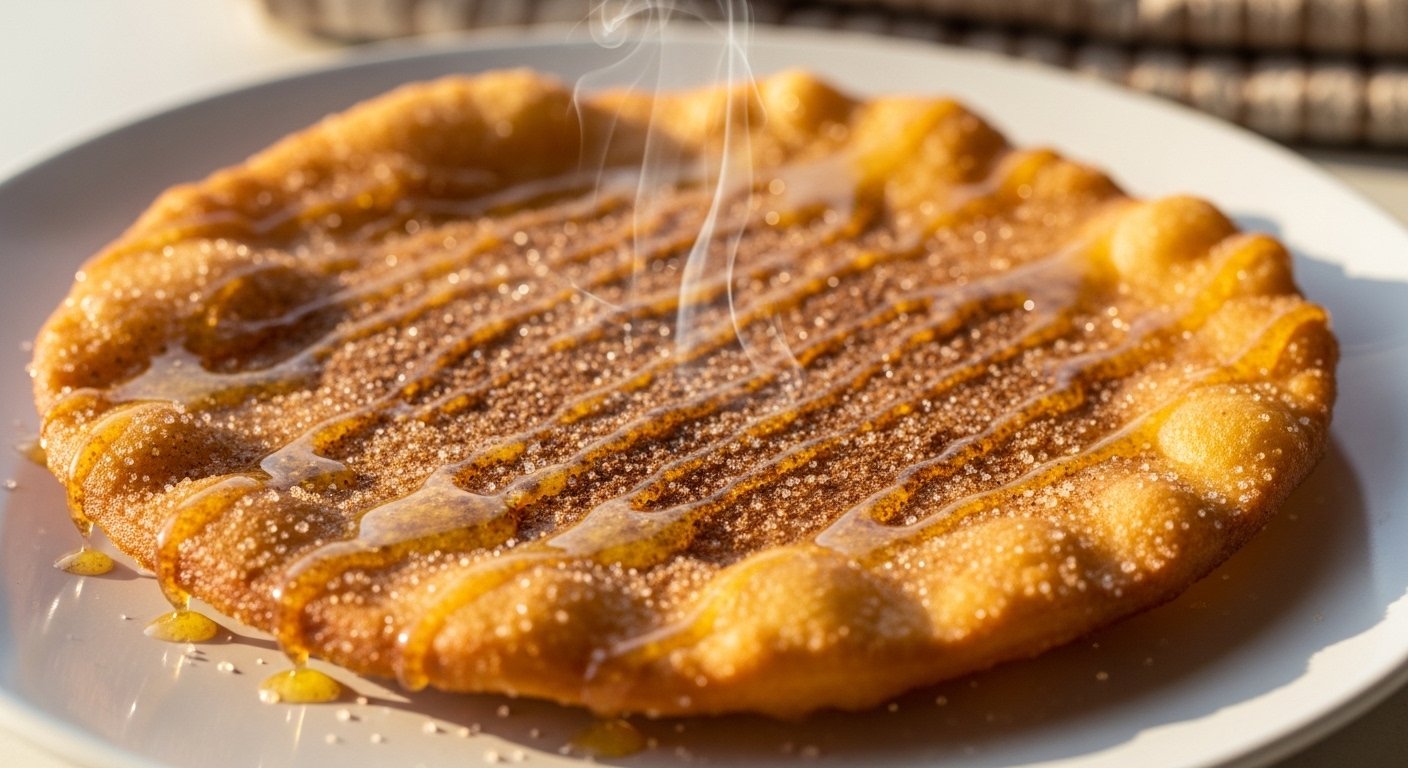
Frying saucers taste wonderful because the dough fries quickly and becomes light and crispy on the outside while staying a little soft inside. After that, you spread butter on the warm surface so it melts right in. Then you add cinnamon sugar that sticks perfectly and gives a sweet, spicy flavor. This combination makes the dessert hard to stop eating.
Another great thing is that you do not need fancy tools or special skills. Most families already have flour, sugar, and oil in their kitchen. Because the recipe uses basic items, it costs much less than buying one at a fair. Over time, many home cooks discover that making frying saucers becomes a fun family activity. Kids love helping stretch the dough and sprinkle the toppings. That’s why this homemade version feels even more special than the ones you buy outside.
Simple Ingredients for Your Frying Saucer Recipe
You will need just a few things to start your frying saucer recipe. Gather these items first so everything goes smoothly:
- 2 cups of all-purpose flour
- 1 teaspoon of baking powder
- Half a teaspoon of salt
- 1 tablespoon of sugar
- Three-quarters cup of warm milk or water
- 2 tablespoons of melted butter or oil for the dough
- Extra oil for frying
- More butter for spreading
- Cinnamon and sugar mixed together for topping
These amounts make about 6 to 8 medium frying saucers. You can easily double everything if you want more. Fresh ingredients work best because they help the dough rise nicely and taste clean. For example, warm milk helps the dough become soft and easy to stretch.
How to Make the Dough Step by Step
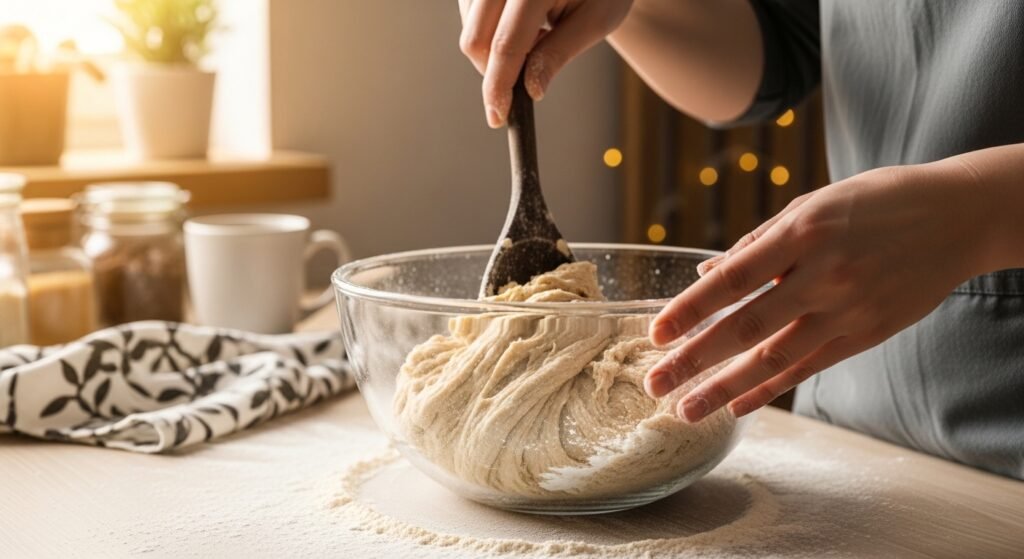
Start by mixing the dry parts in a big bowl. Put in the flour, baking powder, salt, and sugar. Stir them together gently with a spoon. Next, make a small hole in the middle of the dry mix. Pour the warm milk and melted butter into that hole.
Use your hands or a spoon to bring everything together. The dough will feel sticky at first. Keep mixing until it forms a soft ball. If it seems too dry, add a tiny splash of milk. If it feels too sticky, sprinkle in a little more flour. After that, cover the bowl with a clean cloth and let the dough rest for about 20 minutes. This resting time is important because it makes the dough easier to stretch later.
While the dough rests, mix half a cup of sugar with 2 teaspoons of cinnamon in a small bowl. Set this topping aside. You can also melt extra butter in a small pan so it stays warm and ready.
Shaping and Frying Your Frying Saucer
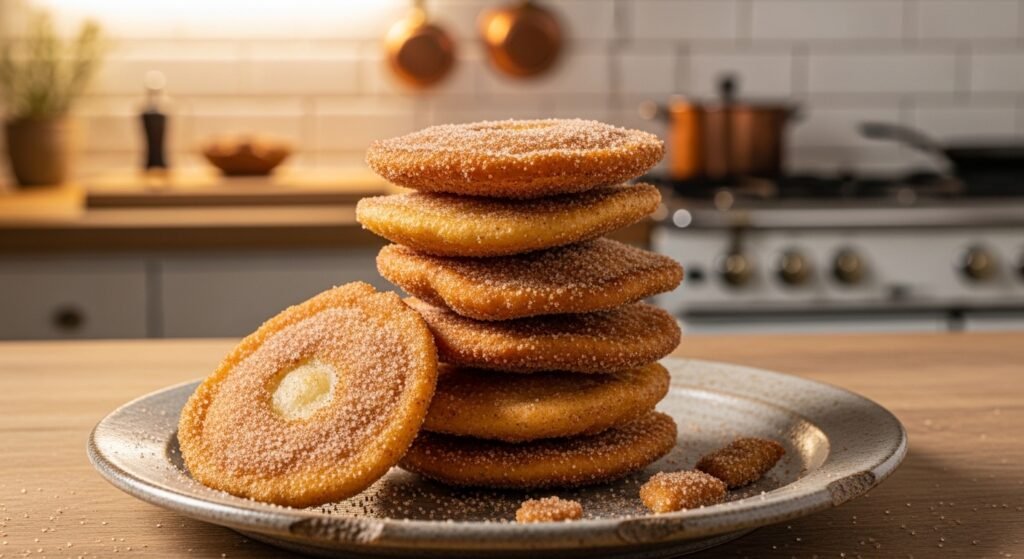
After the resting time, divide the dough into 6 to 8 equal pieces. Take one piece and roll it into a ball with your hands. On a clean table or board, gently stretch the ball into a thin, flat circle. You do not need a rolling pin. Just use your hands to pull and press until the dough looks like a big, thin saucer about 8 to 10 inches wide. It does not have to be perfectly round. A few bumps and thin spots make it look homemade and interesting.
Next, heat oil in a large pan or deep fryer. The oil should be about 2 inches deep and reach around 350 to 375 degrees Fahrenheit. You can test the temperature by dropping a tiny piece of dough into the oil. If it floats and turns golden quickly, the oil is ready.
Carefully place one stretched dough circle into the hot oil. Fry it for about 1 to 2 minutes on the first side until it turns light golden brown. Use tongs or a big slotted spoon to flip it over gently. Fry the second side for another 1 to 2 minutes. The whole frying saucer should look crispy and golden all over.
Take it out of the oil and let extra oil drip off. Place the hot frying saucer on a plate or wire rack. Right away, spread melted butter all over one side. The heat from the dough will melt the butter nicely. Then sprinkle the cinnamon sugar mixture generously. The sugar will stick to the butter and create a sweet crust.
Repeat this process with the rest of the dough pieces. As you work, you will get faster and better at stretching the dough.
Tasty Topping Ideas and Variations
The classic cinnamon sugar topping tastes wonderful on its own. Many people enjoy it just like that because the warm, sweet flavor reminds them of fair days. However, you can try other toppings to make your frying saucer recipe more exciting.
For example, after adding butter, spread on some chocolate sauce or caramel. Chopped nuts or powdered sugar also work well. Fresh fruit like sliced bananas or strawberries can add a fresh taste that balances the crispy dough. Another fun idea is to dust the finished saucer with colored sprinkles for a birthday treat.
Because the base recipe is plain, it welcomes many changes. Over time, you might create your own favorite version that your family asks for again and again. Just remember to add toppings while the frying saucer is still warm so everything melts and sticks together nicely.
Common Mistakes to Avoid When Making Frying Saucer
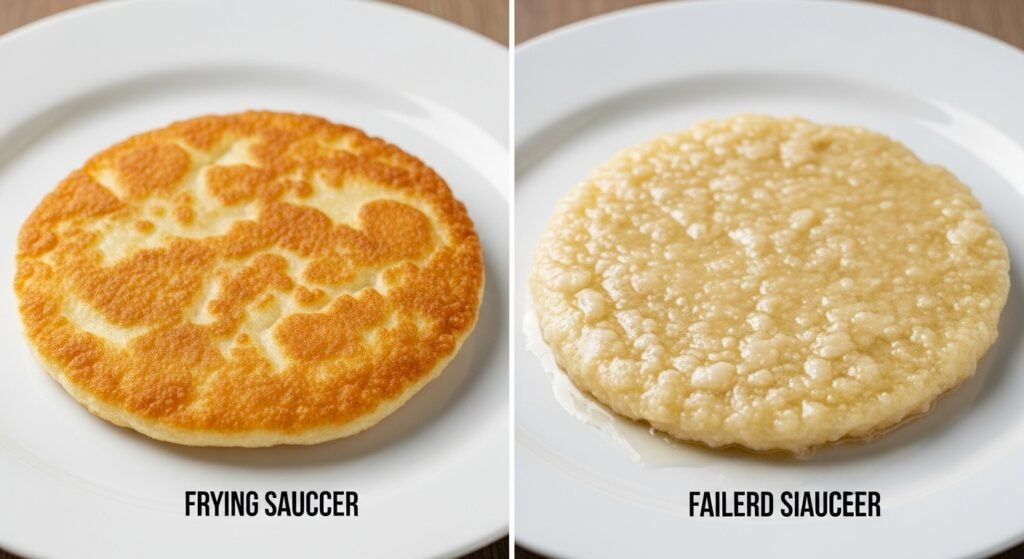
Even simple recipes can have small problems if you are not careful. One common mistake is making the dough too thick. Thick pieces do not fry evenly and stay doughy in the middle. That’s why stretching the dough thin is so important. Another mistake is using oil that is not hot enough. Cool oil makes the saucer greasy instead of crispy.
Some people also forget to let the dough rest. Without resting time, the dough fights back when you try to stretch it. In addition, crowding the pan with too many pieces at once lowers the oil temperature and leads to uneven cooking. Fry one or two at a time for the best results.
Finally, do not leave the finished frying saucers sitting in a pile while they are hot. The steam can make them soft instead of crispy. Let them cool on a rack if you need to make a big batch. These small tips help you create perfect frying saucers every time.
Tips for Success and Safe Frying
Safety matters when you work with hot oil. Always keep children away from the stove while frying. Use long tongs and keep a lid nearby in case you need to cover the pan quickly. Never leave hot oil alone on the stove.
For the best texture, use fresh oil each time you make a large batch. Old oil can give an off taste. After frying, let the used oil cool completely before throwing it away or recycling it properly.
You can also make the dough ahead of time. Keep it in the fridge for up to one day. When you are ready, let it come to room temperature before stretching. This makes planning easier for busy families.
Serving Suggestions for Your Homemade Frying Saucer
Serve frying saucers while they are still warm for the nicest experience. Cut them into wedges like pizza so everyone can share easily. A cold glass of milk or a scoop of vanilla ice cream pairs very well with the warm, sweet dessert.
At parties, you can set up a topping station. Let guests add their own cinnamon sugar, chocolate, or fruit. This activity makes the gathering more fun and personal. For a lighter option, serve smaller saucers as snacks during movie night. The possibilities are many because this dessert is so flexible.
FAQ About Frying Saucer Recipe
Can I make frying saucer without yeast?
Yes, this recipe uses baking powder instead of yeast, so it is quick and easy. You do not need to wait for the dough to rise for a long time.
How do I store leftover frying saucers?
Eat them fresh for the best crispiness. If you have leftovers, keep them in an airtight container at room temperature for one day. Reheat them in a warm oven to bring back some crunch.
Is frying saucer recipe good for beginners?
Absolutely. The steps are simple, and you only need basic kitchen tools. Practice stretching the dough a few times, and you will improve quickly.
Can I use gluten-free flour?
You can try a gluten-free flour blend, but the texture might be a little different. Add an extra egg or more liquid if the dough feels too crumbly.
What oil is best for frying?
Vegetable oil, canola oil, or peanut oil work well because they can reach high temperatures without burning easily.
How thick should the dough be?
Stretch it until you can almost see through it in some spots. Thin dough fries faster and becomes nicely crispy.
Can I bake it instead of frying?
Frying gives the classic texture, but you can brush the stretched dough with oil and bake it at 400 degrees Fahrenheit for about 8 to 10 minutes. It will be different but still tasty.
Final Thoughts on Making Your Own Frying Saucer
Creating a frying saucer recipe at home brings the fun of fair food right into your kitchen. The process is straightforward, the ingredients are easy to find, and the finished dessert always brings smiles. From mixing the simple dough to stretching it thin and adding sweet toppings, each step feels rewarding.
Remember to stay safe with hot oil and enjoy the time spent cooking with loved ones. Whether you make the classic cinnamon version or try new flavors, your homemade frying saucers will become a favorite treat. Give this recipe a try soon, and enjoy every crispy, sweet bite.
Disclaimer:
This article provides general information and a basic homemade recipe for frying saucers (also known as elephant ears). Cooking involves heat and oil, so please use caution and follow safe kitchen practices. Results may vary based on individual equipment and ingredients. The content is for educational and entertainment purposes only and is not intended as professional cooking advice. Always consult reliable sources for any dietary concerns.
Leave a Reply