
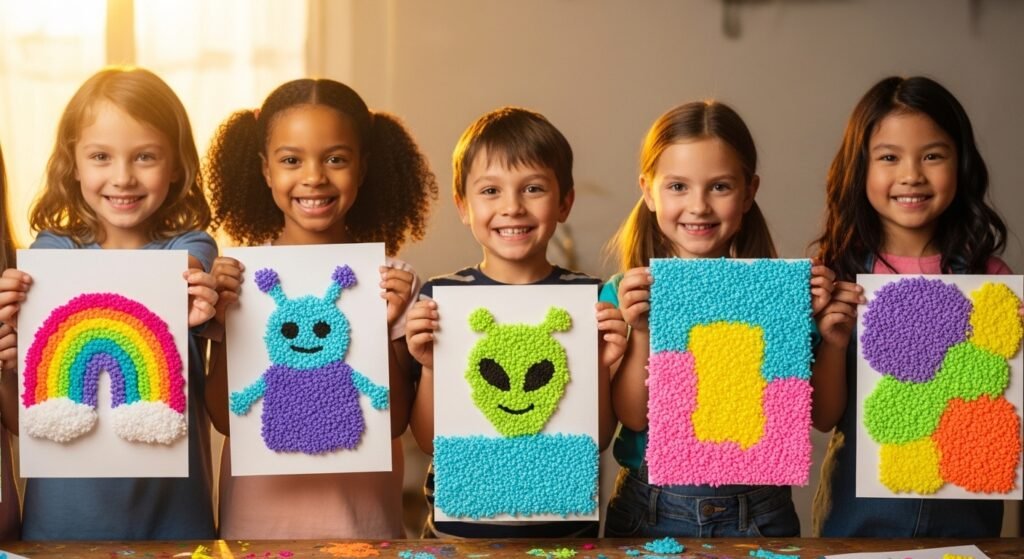
Puffy paint brings so much joy to art time. It rises up and feels soft when it dries. Kids love touching the raised lines and bright colors. This best puffy paint recipe is simple to make at home with things you probably already have. You can create fluffy designs that pop off the paper. Many parents and teachers choose a homemade puffy paint recipe because it costs little and works well for fun projects.
This article will show you step-by-step ways to mix it. You will learn a popular puffy paint recipe with shaving cream and glue. You will also find good options without shaving cream. These easy DIY puffy paint ideas work great for preschool activities and creative play. Let us begin and discover how to make your own puffy paint today.
Why Make Your Own Puffy Paint at Home?
Making puffy paint yourself feels exciting because you control every part. Store-bought versions can be expensive and sometimes dry flat. When you follow a simple puffy paint recipe, the paint stays raised and fun even after drying. This activity helps children practice mixing, measuring, and creating.
In addition, homemade versions let you pick safe colors and avoid strong smells if needed. For example, many families enjoy a shaving cream puffy paint recipe on rainy days when kids need something new to try. Over time, you will see how small changes in the mix make big differences in how puffy it becomes. That is why so many people search for the best puffy paint recipe that fits their home.
Simple Ingredients You Will Need
You only need a few basic things for most recipes. White school glue holds everything together. Shaving cream adds air and fluff. Flour makes the paint stronger so it does not fall flat. Food coloring or washable paint gives pretty colors.
For no-shaving-cream options, you will use more flour and water. Always check that your shaving cream is the foam kind, not gel, because gel does not mix as nicely. These ingredients are easy to find and safe for most children when used with adult help. Next, we will look at exact steps for different kinds of puffy paint.
Classic Puffy Paint Recipe with Shaving Cream and Glue
This easy puffy paint recipe with shaving cream and glue is a favorite for many reasons. It creates soft, raised lines that feel wonderful when dry. Here is how to make it in just a few minutes.
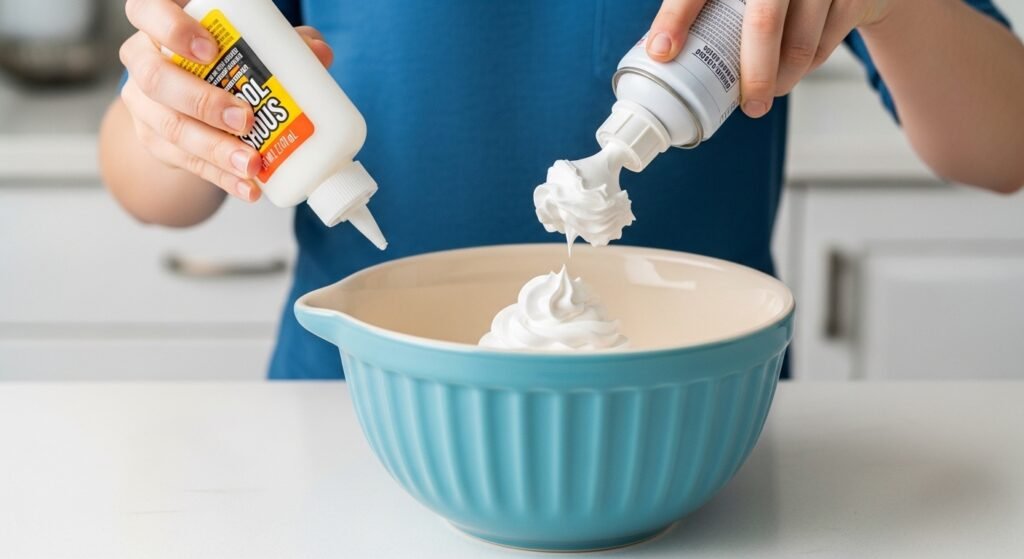
First, gather your supplies. You will need half a cup of white glue and half a cup of shaving cream for each color. Add a few drops of food coloring. Use small bowls so you can make several bright colors at once.
Pour the glue into the bowl. After that, add the same amount of shaving cream. This means one scoop of glue and one scoop of shaving cream. Gently stir them together with a spoon. Do not mix too hard because you want to keep the tiny air bubbles from the shaving cream. Those bubbles help the paint stay puffy.
Next, add your color. A few drops of food coloring are enough. Stir slowly until the color looks even. If the mix feels too thick, add a tiny bit more shaving cream. If it feels too runny, add a little more glue. The right texture is like soft whipped cream.
Now your shaving cream puffy paint recipe is ready. Use paintbrushes, fingers, or even squeeze bottles to create pictures. Let the art dry overnight. In the morning, you will see beautiful raised designs. This glue and shaving cream puffy paint recipe works especially well for cards, pictures, and preschool projects.
Adding Flour for Even Better Results
Many people like to make their puffy paint recipe with flour because it holds shape better. Try this mix for stronger puffy paint. Use three-quarters cup of shaving cream, one-quarter cup of white glue, and one-quarter cup of flour.
Start by mixing the glue and flour first. This step stops lumps from forming. Then slowly add the shaving cream and fold it in gently. Add food coloring last. The flour makes the dried paint feel firmer while the shaving cream keeps it fluffy.
This version of fluffy puffy paint recipe is great when you want the designs to last longer without flattening. For example, children can make handprints or big flowers that stay raised for weeks. Always stir just enough to combine everything. Over-mixing pushes out the air and makes the paint less puffy.
White Puffy Paint Recipe and Color Tips
If you want white puffy paint recipe for snow pictures or clouds, simply leave out the food coloring. The shaving cream and glue already make a nice bright white. You can still add a tiny drop of blue or yellow to make soft shades if you like.
For bright colors, use gel food coloring because it gives stronger shades without making the paint too watery. Another thing is to make small batches so the paint stays fresh. Big bowls of mixed paint can fall flat if they sit too long.
Easy Puffy Paint Recipe Without Shaving Cream
Not everyone has shaving cream at home or wants to use it. That is why a good puffy paint recipe no shaving cream is very helpful. One simple way uses flour, water, and washable paint or food coloring.
Mix one cup of flour with one cup of water until it becomes smooth like thick pudding. Add a few spoonfuls of washable kids’ paint for color. Stir well so there are no lumps. This homemade puffy paint recipe dries with some texture and works nicely for paper art.
Another no-shaving-cream option adds a little salt or baking soda to help it rise slightly when it dries. These versions feel safer for very young children who might touch their mouths. The paint still looks fun and raised compared to regular paint.
Microwave Puffy Paint Recipe for Quick Fun
A microwave puffy paint recipe brings extra surprise. Mix one cup of self-rising flour, one teaspoon of salt, and one cup of water. Add food coloring to small bowls of the mix.
Paint your picture on thick paper. After that, ask an adult to put the paper in the microwave for about thirty seconds. Watch the paint puff up like magic! This simple puffy paint recipe works well for quick activities. The heat makes the paint rise fast. Just be careful because the paper gets warm.
This method is perfect for days when you want fast results. The designs feel light and puffy right away.
Sidewalk Puffy Paint Recipe for Outdoor Play
When the weather is nice, try a sidewalk puffy paint recipe. Mix one cup of flour, one cup of water, and half a cup of shaving cream if you have it. Add food coloring. Put the paint in squeeze bottles for easy drawing on the sidewalk.
The sun helps it dry with nice texture. After play, the rain will wash it away, so cleanup is simple. This outdoor version encourages big movements and creative sidewalk art. Children can draw roads, flowers, or hopscotch boards that feel raised under their fingers.
Helpful Tips for the Best Results Every Time
Always use foam shaving cream, not gel, for the shaving cream puffy paint recipe. Gel does not hold air well. Test a small amount first on paper to see how it dries.
Work on thick paper or cardboard because thin paper can get wet and tear. Keep the paint in small cups with lids if you need to save some for later. Wash brushes right away because dried puffy paint is harder to clean.
For preschool puffy paint activities, let children help measure and stir. They learn numbers and colors while having fun. If the paint feels sticky after drying, you used too much glue. Next time, add more shaving cream. Small changes like this help you find your own perfect mix over time.
Another useful idea is to add a drop of dish soap to no-shaving-cream versions. This makes the paint spread smoother. Always supervise young children during art time for safety.
Common Mistakes to Avoid
Many people mix too fast and lose the fluff. Stir gently to keep air inside. Using old glue or flat shaving cream also makes flat paint. Check your supplies before you start.
Do not add too much water because the paint will run and lose its puffy look. If colors mix together on the paper, let one color dry a little before adding another. These small mistakes are easy to fix once you know what to watch for.
FAQ About Puffy Paint Recipes
How long does homemade puffy paint last?
Fresh batches work best. Use them the same day for the puffiest results. You can keep them in the fridge for one or two days in covered cups.
Is puffy paint safe for toddlers?
Most recipes use non-toxic items, but always check labels. No-shaving-cream versions are often better for children who put hands in their mouths. Adult supervision is important.
Can I use this paint on fabric or canvas?
Yes, but test first. The shaving cream and glue version sticks well to many surfaces. Let it dry completely before touching.
Why does my paint go flat when it dries?
Too much mixing or not enough shaving cream can cause this. Try the version with flour for better staying power.
What if I do not have food coloring?
Washable kids’ paint or liquid watercolors work nicely too. They give good colors without changing the texture much.
How do I make it thicker?
Add a little more flour or glue slowly until it feels right.
Can I make it for outdoor sidewalk use?
Yes. The sidewalk puffy paint recipe with flour and water cleans up easily with a hose.
Final Thoughts on Making Puffy Paint
Creating your own puffy paint opens the door to hours of happy art time. Whether you choose the classic shaving cream and glue mix, add flour for strength, or try a version without shaving cream, you will find something that works for your family. Each recipe brings its own fun surprises.
The best part is watching children smile when their pictures rise up and become special. Try different colors and ideas. Share the joy with friends. With a little practice, you will make wonderful raised art again and again. Keep exploring and enjoy every creative moment.
Disclaimer:
This article is for informational and entertainment purposes only. Recipes and suggestions are general ideas based on common homemade methods. Always check ingredients for allergies or sensitivities. Adult supervision is required for all art activities involving children. Results may vary depending on exact products and conditions. The author and publisher are not responsible for any outcomes from following these ideas.
Leave a Reply