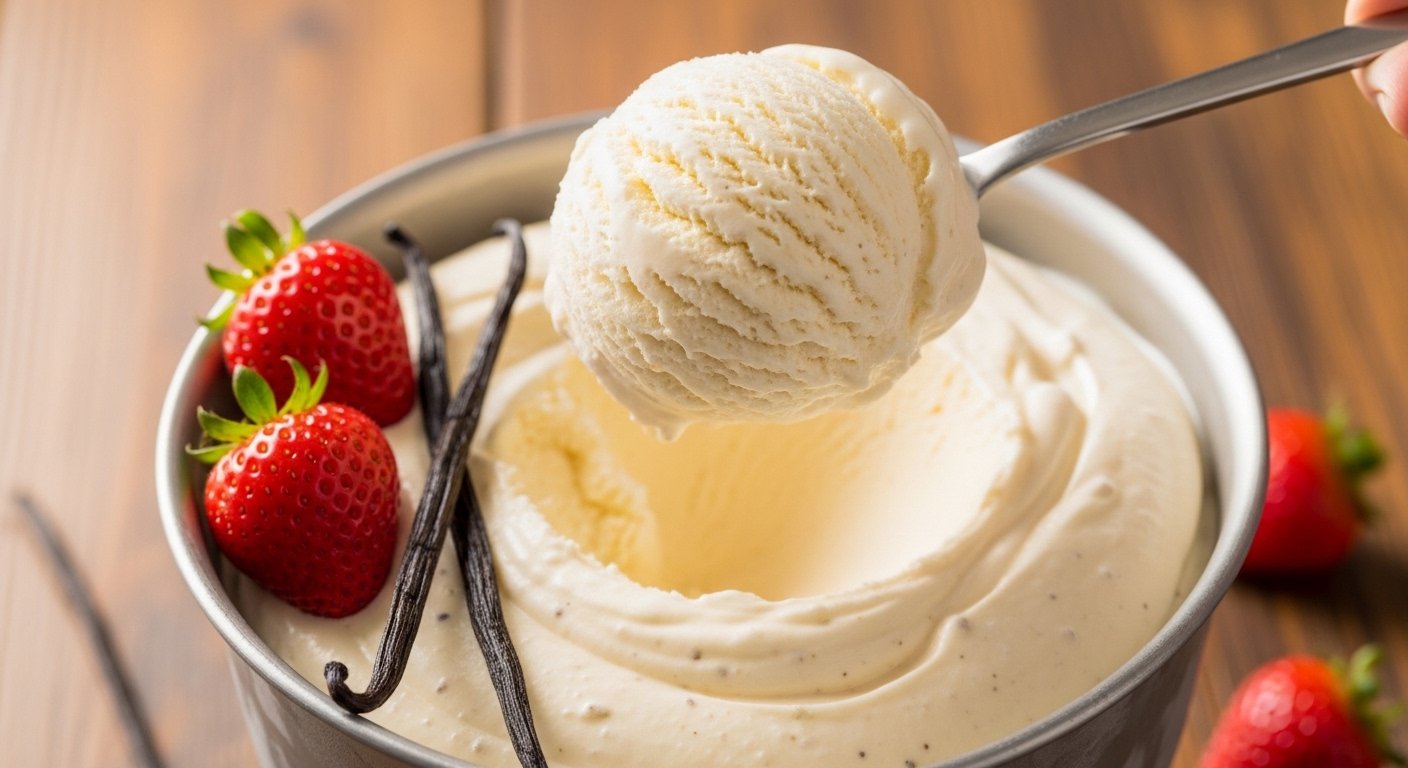
Making your own homemade ice cream recipe for ice cream maker is one of the nicest things you can do on a warm day. You get to choose fresh ingredients and create a treat that feels special. Many people love it because the ice cream turns out so creamy and full of real flavor. Store-bought kinds sometimes taste too sweet or have strange bits. When you make it at home, you control everything. That’s why families enjoy this activity together. Kids can help measure things, and everyone smiles when the machine starts to churn. In addition, it costs less over time than buying many tubs from the shop. Best of all, you can try new tastes whenever you want. This guide will walk you through everything step by step so even beginners feel confident. You will learn how to get that soft, rich texture people talk about. After that, you can enjoy scoops that melt perfectly on your tongue.
Why Homemade Ice Cream Tastes Better Than Store Ice Cream
Homemade ice cream feels different right from the first bite. The air mixes in gently inside the machine, which makes it light yet thick at the same time. Store versions often sit for weeks, so they lose some freshness. When you prepare the mix yourself, every part stays clean and pure. For example, you can pick sweet vanilla beans or fresh fruit from the market. Another thing is that you avoid extra chemicals many companies add to keep the product soft in the freezer. This means your version stays natural and tastes bright. Over time, you will notice how small changes, like using good cream, create big differences in the final scoop. That’s why so many home cooks say once they start, they rarely go back to the freezer section at the store. In addition, making it becomes a happy habit during weekends or birthdays.
Simple Ingredients You Need for the Best Creamy Base
You only need a few basic things to start your homemade ice cream recipe for ice cream maker. Begin with heavy cream because it gives that wonderful rich feel. Next, add whole milk to make the mix smooth without feeling too heavy. Sugar helps everything taste sweet and also keeps the ice cream from turning into a hard block. A tiny pinch of salt brings out all the other flavors in a quiet way, like magic. Finally, pure vanilla extract or a real vanilla bean adds the classic smell and taste most people love first. These ingredients work together because the fat from cream coats your tongue nicely. Another thing is to choose fresh items from your kitchen or nearby shop. For example, if the cream feels cold and thick, your result will stay creamy longer. Many beginners use about two cups of heavy cream and one cup of whole milk for a good size batch. This amount fills most home machines perfectly without spilling over.
Step-by-Step Guide to Prepare the Ice Cream Base
First, pour the milk and half the cream into a clean pot on the stove. Add the sugar and salt while the heat stays low. Stir gently until the sugar disappears completely. This step only takes a few minutes, and you will see the liquid look shiny. After that, take the pot off the heat and pour in the rest of the cold cream. This cools things down quickly so the mix stays safe. Next, stir in the vanilla slowly. Some people like to warm a vanilla bean in the milk first because the tiny black seeds give deeper taste. Let the whole mixture sit for a moment. Then cover the bowl and place it in the fridge for at least two hours, or even overnight. Chilling the base is very important because cold liquid freezes faster and smoother in the machine. That’s why the texture becomes extra creamy instead of icy. In addition, you can taste the mix at this point and add a little more vanilla if you want a stronger smell.
How to Use Your Ice Cream Maker the Right Way
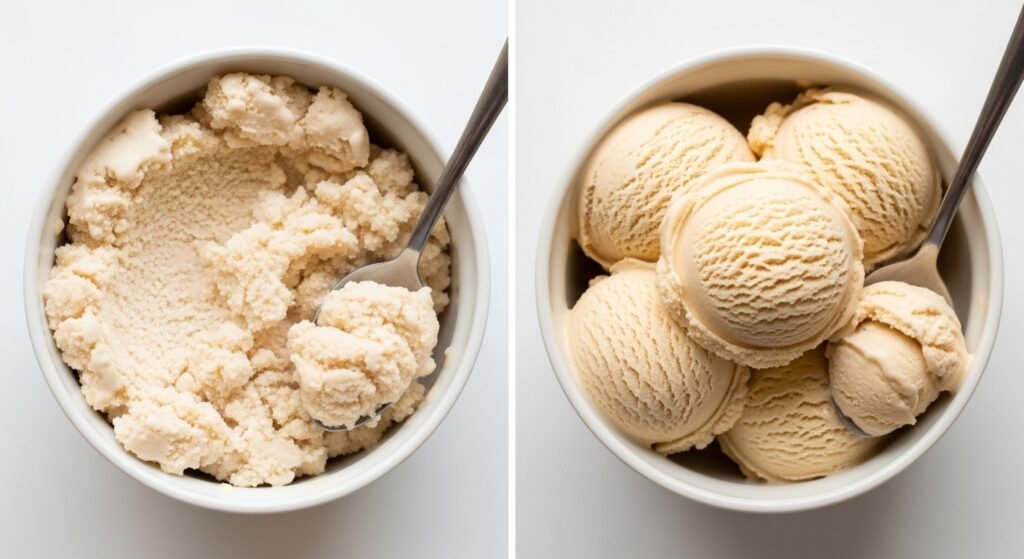
Now the fun part begins. Take your ice cream maker bowl out of the freezer where it has been for at least twenty-four hours. It must feel very cold and solid when you touch it. Pour the chilled base into the bowl while the machine sits on a flat table. Turn it on according to the instructions that came with your model. Most machines need about twenty to thirty minutes to work. During this time, you will hear a soft motor sound and see the mix slowly thicken. The paddle inside turns and scrapes the sides, which adds tiny air bubbles. This action is what makes homemade ice cream light and creamy. After that, stop the machine when the ice cream looks like soft-serve from the shop. It should hold its shape but still move easily. If you like firmer scoops, move everything into a clean container and put it in the freezer for two more hours. This extra step helps the flavors settle nicely without losing softness.
Tips to Make Your Ice Cream Extra Creamy Every Time
Several small tricks help you reach that perfect creamy result each time you try the homemade ice cream recipe for ice cream maker. Always chill the base fully before churning because warm liquid makes bigger ice pieces. Another helpful idea is to keep your machine bowl frozen solid. If it feels only a little cold, the ice cream stays soupy and sad. In addition, do not fill the bowl too full because the mix grows when air enters. Leave some empty space at the top. Over time, you will learn that fresh ingredients beat old ones. For example, cream that sat in the fridge too long can separate and feel grainy. That’s why many cooks buy what they need the same day. Also, taste as you go so you can adjust sweetness gently. These simple habits turn good ice cream into something everyone asks for again and again.
Common Mistakes to Avoid for Smooth Results
Beginners sometimes face small problems, but you can skip them easily. One mistake is taking the bowl out of the freezer too soon. The machine needs real freezing power to work well. Another common error is churning too long because the mix can turn buttery instead of creamy. Stop when it looks thick but still soft. In addition, some people forget to chill the base, which leads to icy bits that crunch between your teeth. That’s why planning ahead saves the day. Do not add big fruit pieces before churning because they can sink or freeze hard. Instead, fold soft mix-ins at the very end. Over time, you will notice these small fixes make a huge difference in texture. For example, a friend once added warm chocolate chips and ended up with streaks instead of nice swirls. Learning from little mistakes helps your next batch taste even better.
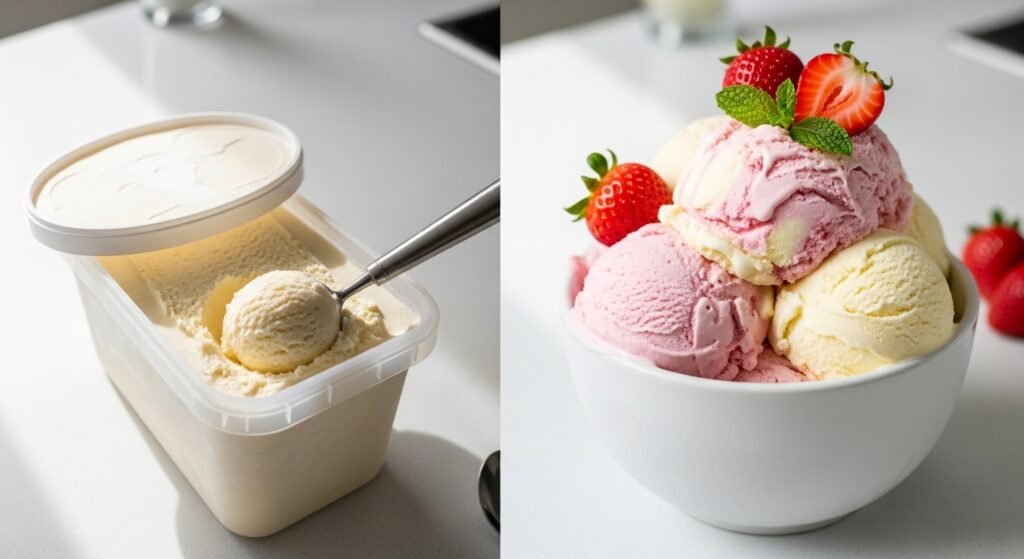
Easy Flavor Ideas to Try After the Basic Recipe
Once you master the plain vanilla base, changing flavors becomes simple and exciting. For chocolate, stir in good cocoa powder while the milk warms on the stove. The color turns rich brown, and the taste feels deep and comforting. Next, try strawberry by mashing fresh berries and adding them after the base chills. The pink color looks pretty, and the fruit bits add bright pops. Another favorite is mint with tiny chocolate pieces folded in at the end. The cool mint feels refreshing on hot days, while the chocolate gives a nice surprise. In addition, you can swirl in caramel or peanut butter for grown-up tastes. For example, warm a little caramel and drizzle it during the last minutes of churning. These ideas work because the basic recipe stays the same, and you only change small parts. Over time, your family will request their own special versions for parties or quiet evenings at home.
How to Store and Serve Your Homemade Ice Cream
After the machine finishes, move the soft ice cream into a container that seals tightly. This keeps air away so the texture stays nice for several days. Place it in the coldest part of your freezer. When you want to eat some, take the container out for five to ten minutes first. This short wait makes scooping easy without waiting too long. Serve in bowls or cones for fun. Add fresh fruit or a sprinkle of nuts on top if you like. Another thing is to label the container with the flavor and date because different kinds taste best within one week. That’s why small batches work great for most families. In addition, leftover ice cream makes wonderful milkshakes when blended with a little milk. These serving ideas help you enjoy every scoop without waste.
FAQ About Making Homemade Ice Cream in an Ice Cream Maker
Can I make ice cream without eggs?
Yes, many easy recipes skip eggs and still turn out creamy. The cream and sugar do most of the work when chilled properly.
How long does the machine need to run?
Most home machines finish in twenty to thirty minutes. Watch for soft-serve thickness instead of counting exact minutes.
Why does my ice cream sometimes turn icy?
The base was probably not cold enough, or the freezer bowl was not frozen solid. Chill everything well next time.
Can I add fruit or cookies?
Yes, but add soft pieces after churning so they stay mixed and do not freeze too hard.
How do I clean the machine after use?
Rinse the bowl and paddle with warm soapy water right away. Dry everything before putting the bowl back in the freezer.
Is it okay to double the recipe?
Check your machine size first. Many models handle one and a half times the base best without overflowing.
What if I do not have heavy cream?
Whole milk with a little extra sugar can work, but the texture will feel lighter than full cream versions.
Final Thoughts on Enjoying Your Homemade Treat

Learning this homemade ice cream recipe for ice cream maker opens a world of sweet possibilities. You start with simple steps and end with scoops that make people happy. The process teaches patience because good things take a little chilling time. Yet every batch brings joy when friends and family gather around the table. You control the sweetness, the mix-ins, and the freshness in ways no shop can match. Over time, it becomes more than a dessert. It turns into a memory maker for warm afternoons and special celebrations. Try the basic version first, then play with flavors that match your mood. Soon you will have your own favorite way to create creamy, dreamy ice cream at home. Keep it fun, stay curious, and enjoy every smooth bite.
Disclaimer:
This article provides general information and a basic recipe based on common homemade methods. Results can vary depending on your ingredients, equipment, and technique. Always follow safety guidelines when using kitchen appliances and consult a professional for any dietary concerns. The content is for entertainment and educational purposes only and does not guarantee specific outcomes. We are not responsible for any issues that may arise from following these suggestions.
Leave a Reply